
How to Use a Meat Thermometer: Placement, Calibration and Safe Temps
Where to put the probe, how to calibrate it, and the safe internal temperatures, every one quoted from a named federal or extension source.
Every temperature on this page is quoted from USDA FSIS, FoodSafety.gov, the FDA Food Code, or a land-grant extension service, with that source’s own last-updated date.
To use a meat thermometer, insert it into the thickest part of the food, away from bone, fat and gristle, and wait for the reading to settle. For thin foods — burgers, chops, boneless breasts — go in through the side so the sensing area sits inside the meat. Check whole poultry in three places: the innermost thigh, the innermost wing, and the thickest part of the breast. Then compare against the USDA safe minimum: 165°F for all poultry, 160°F for ground meats, 145°F with a 3-minute rest for whole cuts of beef, pork, lamb and veal.
The parts that matter
- Calibrating with boiling water at altitude will make you undercook everything. In Denver water boils at 202.4°F, not 212°F. A cook who “corrects” a perfectly good thermometer against 212°F builds in a permanent 9.6°F error — 12.6°F in Flagstaff. We built the correction table below because FSIS tells you to go find it somewhere else.
- Use the ice-water method instead. 32°F is 32°F at every elevation on earth.
- Color is not a doneness test, and USDA has the data. Its own research found ground beef patties that looked well-done at 131°F, and more than 25% of patties browned before reaching a safe 160°F.
- Safe is not the same as tender. A brisket clears its USDA safe minimum around hour three of a twelve-hour cook. Everything after that is texture.
- USDA disagrees with USDA on ham. FSIS says reheat a USDA-plant fully cooked ham to 140°F; FoodSafety.gov says 165°F. Both pages are current.
How do you use a meat thermometer?
Four steps, and only one of them is the actual measurement.
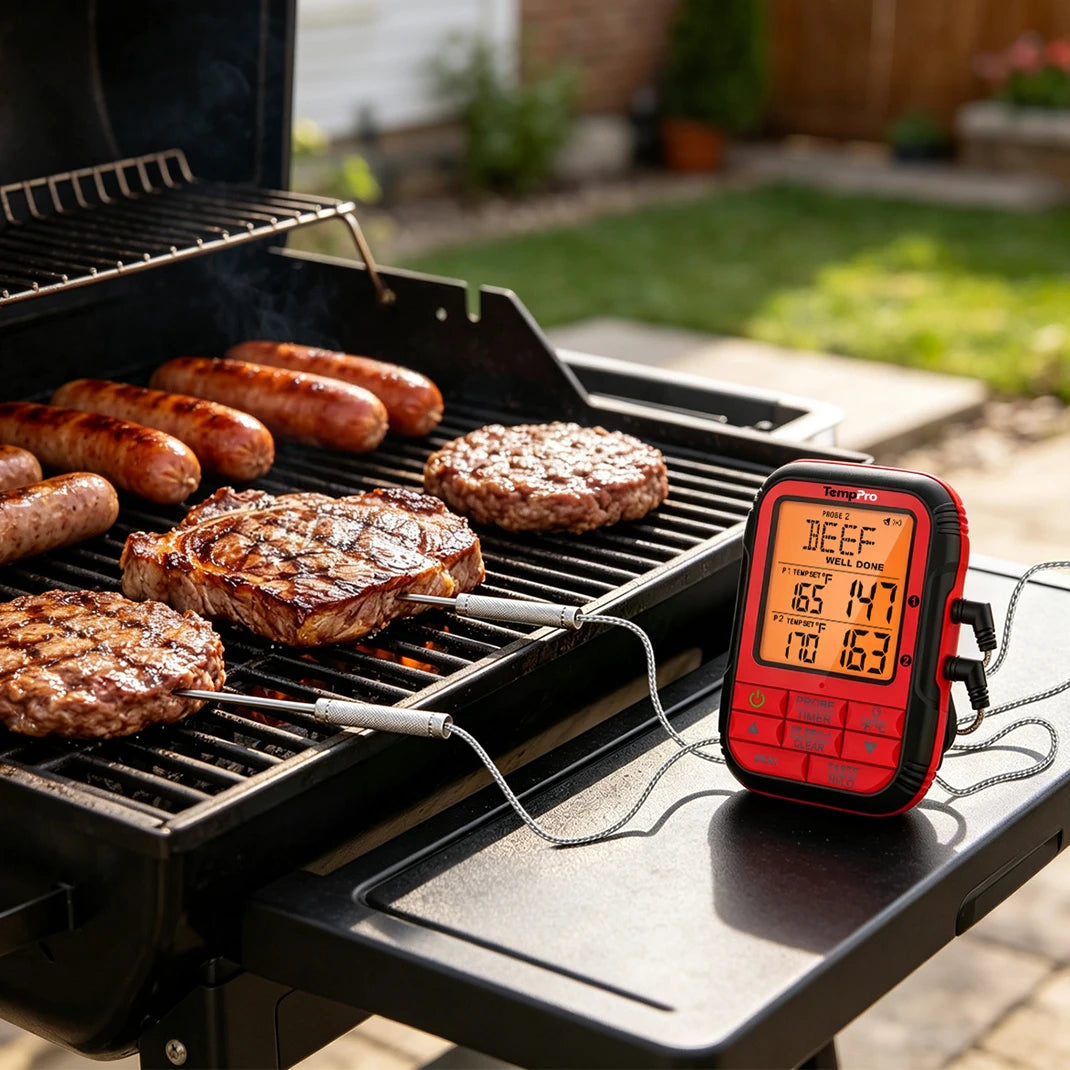
- Know your thermometer’s sensing area. A thermocouple senses at the tip. A dial bimetal thermometer averages temperature along 2 to 2½ inches of stem. That difference decides everything else.
- Insert to the correct depth in the thickest part, away from bone, fat and gristle. For thin foods, go in through the side.
- Wait for the type’s response time — 2 to 5 seconds for a thermocouple, about 10 for a digital instant-read, 1 to 2 minutes for a dial.
- Check more than one spot on anything large or irregular, and check every piece when you are cooking several.
USDA FSIS puts the core rule this way in its Food Thermometers factsheet (last updated March 21, 2025): “The food thermometer should be placed in the thickest part of the food, away from bone, fat or gristle. For thin foods, the food thermometer should be inserted through the side until it reaches the center of the food.”
One refinement worth borrowing, and it is the single best idea anywhere on this subject: J. Kenji López-Alt at Serious Eats argues you should push the probe all the way through the meat until it emerges out the far side, then slowly withdraw it and take the lowest reading you see. You are not looking for the geometric center — you are looking for the coolest point, and on an irregular cut those are not the same place. It costs three extra seconds and it is more reliable than guessing where the middle is.

What temperature should meat reach? The USDA chart
This is the table everything else on this page serves. It comes from FoodSafety.gov (last reviewed November 21, 2024), which is the more complete of the two federal charts, with the FSIS variations noted.
| Food | Type | Safe minimum internal temperature | Rest time |
|---|---|---|---|
| Beef, bison, veal, goat, lamb | Steaks, roasts, chops | 145°F (63°C) | 3 minutes |
| Beef, bison, veal, goat, lamb | Ground meat, sausage | 160°F (71°C) | None |
| Pork | Steaks, roasts, chops | 145°F (63°C) | 3 minutes |
| Pork | Ground meat, sausage | 160°F (71°C) | None |
| Chicken, turkey, all poultry | Whole bird, parts, ground, giblets, stuffing | 165°F (74°C) | None |
| Ham | Raw, fresh or smoked, uncooked | 145°F (63°C) | 3 minutes |
| Ham | Precooked, to reheat | 165°F — but see the conflict below | None |
| Rabbit, venison | Wild or farm-raised | 160°F (71°C) | None |
| Eggs | Raw | Cook until yolk and white are firm | None |
| Eggs | Dishes (frittata, quiche) | 160°F (71°C) | None |
| Eggs | Casseroles with meat or poultry | 165°F (74°C) | None |
| Seafood | Fish, whole or filet | 145°F (63°C), or until flesh is no longer translucent | None |
| Seafood | Shrimp, lobster, crab, scallops | Cook until pearly or white and opaque | None |
| Seafood | Clams, oysters, mussels | Cook until shells open | None |
| Leftovers | Any type | 165°F (74°C) | None |
| Casseroles | Meat and meatless | 165°F (74°C) | None |
FSIS’s own Safe Temperature Chart (last updated April 14, 2025) adds a standalone “Ground Poultry 165°F” row and drops bison, goat, rabbit, venison and the shellfish detail. Use FoodSafety.gov’s version as the base.
Where the two federal charts disagree
Four documented conflicts between USDA’s own pages, all live as of August 19, 2026.
| # | Subject | What one page says | What the other says |
|---|---|---|---|
| 1 | Precooked ham, to reheat | FSIS: 140°F if packaged in a USDA-inspected plant; 165°F for all others | FoodSafety.gov: 165°F, flat, with no provenance qualifier |
| 2 | Stuffed 6–8 lb turkey breast | FSIS “Let’s Talk Turkey” (Nov 17, 2023): 2½ to 3½ hours | FoodSafety.gov (Sep 21, 2023): 3 to 3½ hours |
| 3 | Ham, reheat fully cooked | FSIS Safe Temperature Chart: 140°F only for USDA-plant hams | FSIS High Altitude Cooking (Aug 13, 2024): 140°F with no qualifier — FSIS contradicting FSIS |
| 4 | Pork | FSIS body text: 145°F (correct since 2011) | FSIS “Doneness Versus Safety” tips list (Jul 10, 2024): still says 160°F for pork — pre-2011 language never updated |
None of these will hurt you if you cook to the higher number. But they are worth knowing about, because a reader following FoodSafety.gov will overcook a USDA-plant ham by 25 degrees, and a reader who finds the stale FSIS tips list will overcook pork chops by 15.
How do I know if my meat thermometer is correct?
You calibrate it. There are two accepted methods, and one of them is a trap.
The ice-water method — use this one
FSIS, verbatim: “fill a large glass with ice cubes. Add drinking water to the glass and stir well. Immerse the food thermometer stem a minimum of 2 inches into the mixture, touching neither the sides nor the bottom of the glass. Wait a minimum of 30 seconds and check the reading without removing the stem from the water. It should read 32 degrees F.”
The University of Maryland Extension’s FS-1092 factsheet (August 2019) sharpens it: use finely crushed ice, not cubes, packed dense with potable water. A slushy, tightly packed slurry is what actually pins 32.0°F; a glass of cubes with water sloshing around them does not. Maryland also gives the recalibration schedule: “Daily is ideal, but at least weekly,” plus after any drop or large temperature change.
The reason to prefer this method is simple: the freezing point of water does not change with elevation. 32°F in Miami is 32°F in Leadville.
The boiling-water method — and the altitude trap
FSIS also describes boiling-point calibration, and then says something remarkable: “Boiling water’s temperature may vary in high altitudes… Check with the local Cooperative Extension System office or health department for the exact temperature of boiling water in your high-altitude area.”
That is a federal agency telling you the number you need is somewhere else. So we built it.
This is a real food-safety hazard, not a technicality. A cook in Denver dips a brand-new, perfectly accurate thermometer in boiling water, sees 202°F, concludes it reads about 10 degrees low, and adjusts it up by 10 degrees. From that moment on, every chicken breast that reads 165°F is actually 155°F. Every burger that reads 160°F is actually 150°F. The “correction” installed a permanent 9.6°F undercook. In Flagstaff the error is 12.6°F.
Boiling point of water by elevation
| Elevation (ft) | Station pressure (mb) | Water boils at | Error if you calibrate to 212°F |
|---|---|---|---|
| 0 | 1013.2 | 212.0°F | 0.0°F low |
| 500 | 995.1 | 211.1°F | 0.9°F low |
| 1,000 | 977.2 | 210.2°F | 1.8°F low |
| 1,500 | 959.5 | 209.3°F | 2.7°F low |
| 2,000 | 942.1 | 208.4°F | 3.6°F low |
| 2,500 | 925.0 | 207.4°F | 4.6°F low |
| 3,000 | 908.1 | 206.5°F | 5.5°F low |
| 3,500 | 891.4 | 205.6°F | 6.4°F low |
| 4,000 | 875.1 | 204.7°F | 7.3°F low |
| 4,500 | 858.9 | 203.8°F | 8.2°F low |
| 5,000 | 843.0 | 202.9°F | 9.1°F low |
| 5,500 | 827.3 | 202.0°F | 10.0°F low |
| 6,000 | 811.9 | 201.0°F | 11.0°F low |
| 6,500 | 796.7 | 200.1°F | 11.9°F low |
| 7,000 | 781.8 | 199.2°F | 12.8°F low |
| 7,500 | 767.0 | 198.3°F | 13.7°F low |
| 8,000 | 752.5 | 197.4°F | 14.6°F low |
| 8,500 | 738.2 | 196.5°F | 15.5°F low |
| 9,000 | 724.2 | 195.5°F | 16.5°F low |
| 9,500 | 710.3 | 194.6°F | 17.4°F low |
| 10,000 | 696.7 | 193.7°F | 18.3°F low |
Download the full table as CSV (250-ft increments, 0–10,000 ft)
How these numbers were produced. Station pressure from the NOAA/National Weather Service pressure-altitude relation, inverted for elevation; boiling point from the Antoine equation using the NIST Chemistry WebBook coefficient set for water (Bridgeman & Aldrich 1964, valid 344–373 K): A = 5.08354, B = 1663.125, C = −45.622. Validation: the method returns exactly 212.0°F at sea level and reproduces Colorado State University Extension’s published anchors within 0.7°F at every point (2,000 ft: computed 208.4 vs published 208; 5,000 ft: 202.9 vs 203; 7,500 ft: 198.3 vs 198; 10,000 ft: 193.7 vs 193). It also matches FSIS’s own rule of thumb — “with each 500-feet increase in elevation, the boiling point of water is lowered by just under 1°F” — at a computed 0.91°F per 500 ft near sea level. Assumes U.S. Standard Atmosphere; the actual boiling point on any given day shifts roughly ±1°F with a ±25 mb weather swing, which is another reason to prefer ice water.
Boiling point in specific cities
| City | Elevation | Water boils at | Calibration error if you use 212°F |
|---|---|---|---|
| Atlanta, GA | 1,050 ft | 210.1°F | 1.9°F |
| Boise, ID | 2,704 ft | 207.1°F | 4.9°F |
| Salt Lake City, UT | 4,264 ft | 204.2°F | 7.8°F |
| Albuquerque, NM | 4,955 ft | 202.9°F | 9.1°F |
| Denver, CO | 5,238 ft | 202.4°F | 9.6°F |
| Cheyenne, WY | 6,091 ft | 200.9°F | 11.1°F |
| Flagstaff, AZ | 6,900 ft | 199.4°F | 12.6°F |
Elevations from the USGS 3DEP Elevation Point Query Service at each city’s downtown coordinate, queried August 19, 2026, at 1-meter resolution. City elevation is a range, not a single number — USGS separately publishes Denver’s city high point as 5,470 ft, which works out to 202.0°F, a 0.4°F difference from the downtown value. Immaterial for calibration, but worth being transparent about.
How accurate does a thermometer have to be?
Three different answers, and the gap between them is instructive.
| Standard | Requirement | Applies to |
|---|---|---|
| FDA Food Code 2022, § 4-203.11 | ±1°C for Celsius or dual-scale devices; ±2°F for Fahrenheit-only devices, in the intended range of use | Regulated food establishments |
| FSIS Food Thermometers factsheet (Mar 21, 2025) | “Most food thermometers will give an accurate reading within 2 to 4 degrees F“ | A description of the consumer market, not a standard |
| UConn Food Safety (Jan 11, 2022) | “If the thermometer is only a few degrees off, just remember to make the adjustment… If it is more than a few degrees off, buy a new one” | Practical home guidance |
Read those together and the point lands: a thermometer that reads 4°F off is normal at retail and illegal in a restaurant. That gap is the entire argument for calibrating yours.
Where exactly do you put the thermometer? Placement by cut
All quotes below are from the FSIS Food Thermometers factsheet, last updated March 21, 2025, unless noted.
| What you’re cooking | Where the probe goes | Source status |
|---|---|---|
| Whole poultry (chicken, turkey) | Three places: the innermost part of the thigh, the innermost part of the wing, and the thickest part of the breast. Avoid the bone. | FSIS, stated identically on four separate pages |
| Stuffing inside a bird | Center of the stuffing must reach 165°F. FSIS: “For optimum safety, do not stuff whole poultry.” | FSIS |
| Poultry parts (breasts, thighs, wings) | Thickest area, avoiding the bone. Thinner pieces: through the side. | FSIS |
| Bone-in roasts (beef, pork, lamb) | Midway in the roast, in the thickest part, avoiding bone, fat and gristle | FSIS |
| Steaks and chops | Thickest part, away from bone, fat or gristle | FSIS |
| Burgers, sausages, thin chops, thin breasts | Through the side, so the entire sensing area (usually 2–3 inches on an instant-read) sits within the center of the food | FSIS; FDA Food Code § 4-302.12(B) makes a small-diameter probe mandatory in commercial kitchens for this reason |
| Ground poultry patties | Side insertion, same as burgers — but the target is 165°F, not 160°F | FSIS |
| Whole fish | Thickest portion, or the center of the fish | FSIS |
| Egg dishes and casseroles | Thickest portion or center of the dish; check egg dishes in several places | FSIS |
| Brisket | Into the thickest part of the flat, parallel to the grate, avoiding the fat seam between point and flat — the seam reads high and is not meat | Our applied guidance, derived from FSIS’s stated principles. USDA publishes nothing cut-specific for brisket. |
| Pork shoulder / Boston butt | Into the thickest muscle, away from the blade bone, checking two or three spots because the cut is irregular | Our applied guidance. FSIS covers roasts only generically. |
Two corrections worth making. First: several popular guides still tell you to check a whole bird in the inner thigh only. FSIS moved off that — it now specifies three check points, and says so on four separate pages including “Let’s Talk Turkey,” “Turkey Basics: Safe Cooking,” “Doneness Versus Safety,” and “High Altitude Cooking.” Second: we could not find any USDA or extension source publishing the familiar “don’t let the probe touch the pan” rule in those words. It follows logically from FSIS’s stated principles, but we are labeling it as derived guidance rather than dressing it up as a government rule.
How deep does the probe go? It depends on the type
| Thermometer type | Minimum insertion depth | Time to read | Leave in while cooking? | Calibratable? |
|---|---|---|---|---|
| Thermocouple | ¼ inch or deeper as needed | 2–5 sec | No | Yes |
| Thermometer fork combination | At least ¼ inch, thickest part | 2–10 sec | No | No |
| Thermistor (digital instant-read) | At least ½ inch | ~10 sec | No | Not all models |
| Oven cord thermometer | At least ½ inch | ~10 sec | Yes | No |
| Single-use temperature indicator | About ½ inch | 5–10 sec | No | n/a |
| Wireless / smart thermometer | At least 1 inch, thickest part | Leave in | Yes | Yes |
| Liquid-filled (glass or metal stem) | At least 2 inches, thickest part | 1–2 min | Yes | Some |
| Dial, oven-safe bimetal | 2 to 2½ inches, thickest part | 1–2 min | Yes | Some |
| Dial, instant-read bimetal | 2 to 2½ inches, thickest part | 15–20 sec | No | Some |
The bimetal trap: when the sensor is longer than the food is thick
This is the failure mode nobody explains, and FSIS states it outright: a dial bimetal thermometer “senses temperature from its tip and up the stem for 2 to 2½ inches. The resulting temperature is an average of the temperatures along the sensing area… it is not appropriate to measure the temperature of any food less than 3 inches thick.”
Stick a dial thermometer straight down into a three-quarter-inch burger and most of that sensing coil is measuring air. The reading is an average of meat and kitchen. You have two fixes:
- Side-insert so the entire 2–2½ inch coil sits inside the food, or
- Use a thermocouple or thermistor, where the sensor lives in the tip.
FSIS also warns about stem conduction: “heat conducts along the stem’s metal surface faster than through the food,” so the spot touching the tip reads hotter than the meat beside it. Its remedy is to take a second and third reading elsewhere, letting the thermometer equilibrate at least one minute each time. That applies to bimetal and liquid-filled types, not to thermocouples.
What about infrared thermometers?
They cannot tell you whether meat is done. An infrared thermometer reads surface temperature only. It is a actually useful tool for checking a griddle, a pizza stone, or a pan — and useless for verifying the inside of a chicken thigh.
Worth being straight about the sourcing here: we searched FSIS, FoodSafety.gov, the full FDA Food Code 2022, and the Penn State, UConn, Maryland, SDSU and Purdue extension services. None of them address infrared food thermometers at all. The Food Code mentions “infrared” exactly once, and only about heat-lamp shielding. The best available source is trade, not government: Robert W. Powitz, Ph.D., MPH, writing in Food Safety Magazine (October 1, 2006), states plainly that “the IR thermometer will only measure surface temperatures and not internal temperatures,” notes that most foods have an emissivity near 0.95 while shiny surfaces vary widely, and describes typical distance-to-spot ratios around 6:1. The physics is uncontroversial regardless of who publishes it.
And pop-up timers?
Better than their reputation, and the failure mode is not what people think. FSIS: pop-up devices “are reliable to within 1 to 2 degrees F. But proper placement is important. Checking with a conventional food thermometer is always recommended as an added precaution to properly gauging both safety and doneness.”
So the mechanism works — a food-grade nylon housing with a stainless spring and an organic firing material engineered to melt at a set temperature, in use since 1965. What you cannot verify is whether the factory put it in a spot that represents the coolest part of your particular bird. Trust the device, verify the location.
The government table almost nobody has seen: time and temperature
165°F for poultry is not a magic threshold where bacteria die. It is the temperature at which the required kill happens instantly. Hold poultry at a lower temperature for long enough and you achieve exactly the same lethality.
USDA publishes the numbers. They live in the FSIS Cooking Guideline for Meat and Poultry Products (Revised Appendix A), December 2021, Document ID FSIS-GD-2021-14 — a 92-page PDF where the tables are embedded as images, which is why they never show up in text searches and effectively do not exist for consumers.
Read this before you read the tables. These are commercial processing standards for establishments operating under HACCP, not home-cooking recommendations. FSIS’s consumer guidance remains 165°F for poultry. Three conditions come attached and they are not optional: the temperature must be met in all parts of the product for the total dwell time, not just at one probe point; relative humidity is a critical operating parameter; and FSIS recommends limiting total time between 50°F and 130°F to six hours or less. A home cook cannot verify “all parts of the product.” Treat these tables as understanding, not as permission.
Table 2 — Meat products
FSIS: “Temperatures stated are the minimum internal temperatures that must be met in all parts of the meat product for the total dwell time listed.”
| °F | °C | 6.5-log₁₀ lethality | 7-log₁₀ lethality |
|---|---|---|---|
| 130°F | 54.4°C | 112 min | 121 min |
| 131°F | 55.0°C | 89 min | 97 min |
| 132°F | 55.6°C | 71 min | 77 min |
| 133°F | 56.1°C | 56 min | 62 min |
| 134°F | 56.7°C | 45 min | 47 min |
| 135°F | 57.2°C | 36 min | 37 min |
| 136°F | 57.8°C | 28 min | 32 min |
| 137°F | 58.4°C | 23 min | 24 min |
| 138°F | 58.9°C | 18 min | 19 min |
| 139°F | 59.5°C | 15 min | 15 min |
| 140°F | 60.0°C | 12 min | 12 min |
| 141°F | 60.6°C | 9 min | 10 min |
| 142°F | 61.1°C | 8 min | 8 min |
| 143°F | 61.7°C | 6 min | 6 min |
| 144°F | 62.2°C | 5 min | 5 min |
| 145°F | 62.8°C | 4 min | 4 min |
| 146°F | 63.3°C | 169 sec | 182 sec |
| 147°F | 63.9°C | 134 sec | 144 sec |
| 148°F | 64.4°C | 107 sec | 115 sec |
| 149°F | 65.0°C | 85 sec | 91 sec |
| 150°F | 65.6°C | 67 sec | 72 sec |
| 151°F | 66.1°C | 54 sec | 58 sec |
| 152°F | 66.7°C | 43 sec | 46 sec |
| 153°F | 67.2°C | 34 sec | 37 sec |
| 154°F | 67.8°C | 27 sec | 29 sec |
| 155°F | 68.3°C | 22 sec | 23 sec |
| 156°F | 68.9°C | 17 sec | 19 sec |
| 157°F | 69.4°C | 14 sec | 15 sec |
| 158°F | 70.0°C | 0 sec | 0 sec |
| 159°F | 70.6°C | 0 sec | 0 sec |
| 160°F | 71.1°C | 0 sec | 0 sec |
FSIS footnote 5, verbatim: “The required Log reductions are achieved instantly (0 seconds) when the internal temperature of a cooked meat product reaches 158°F or above.”
Tables 3 and 4 — Chicken and turkey, 7-log Salmonella reduction
Fat protects bacteria, so the dwell time rises with fat content. The 1% and 12% columns bracket every real case. Note that turkey needs longer than chicken at the same temperature — FSIS built two separate tables because Salmonella’s heat tolerance is species-dependent (Juneja et al., 2001a).
| °F | °C | Chicken | Turkey | ||
|---|---|---|---|---|---|
| 1% fat | 12% fat | 1% fat | 12% fat | ||
| 136°F | 57.8°C | 63.3 min | 81.4 min | 64 min | 70.8 min |
| 137°F | 58.3°C | 50.1 min | 65.5 min | 51.9 min | 58.5 min |
| 138°F | 58.9°C | 39.7 min | 52.9 min | 42.2 min | 48.5 min |
| 139°F | 59.4°C | 31.6 min | 43 min | 34.4 min | 40.4 min |
| 140°F | 60.0°C | 25.2 min | 35 min | 28.1 min | 33.7 min |
| 141°F | 60.6°C | 20.1 min | 28.7 min | 23 min | 28.2 min |
| 142°F | 61.1°C | 16.1 min | 23.5 min | 18.9 min | 23.7 min |
| 143°F | 61.7°C | 13 min | 19.3 min | 15.5 min | 19.8 min |
| 144°F | 62.2°C | 10.4 min | 15.9 min | 12.8 min | 16.6 min |
| 145°F | 62.8°C | 8.4 min | 13 min | 10.5 min | 13.8 min |
| 146°F | 63.3°C | 6.8 min | 10.6 min | 8.7 min | 11.5 min |
| 147°F | 63.9°C | 5.5 min | 8.6 min | 7.1 min | 9.4 min |
| 148°F | 64.4°C | 4.4 min | 6.8 min | 5.8 min | 7.7 min |
| 149°F | 65.0°C | 3.5 min | 5.4 min | 4.7 min | 6.2 min |
| 150°F | 65.6°C | 2.7 min | 4.2 min | 3.8 min | 4.9 min |
| 151°F | 66.1°C | 2.1 min | 3.1 min | 3 min | 3.8 min |
| 152°F | 66.7°C | 1.5 min | 2.3 min | 2.3 min | 2.8 min |
| 153°F | 67.2°C | 1.2 min | 1.6 min | 1.8 min | 2.1 min |
| 154°F | 67.8°C | 55.9 sec | 1.1 min | 1.5 min | 1.6 min |
| 155°F | 68.3°C | 44.2 sec | 54.4 sec | 1.2 min | 1.3 min |
| 156°F | 68.9°C | 35 sec | 43 sec | 59 sec | 1 min |
| 157°F | 69.4°C | 27.7 sec | 34 sec | 47.9 sec | 50.4 sec |
| 158°F | 70.0°C | 21.9 sec | 26.9 sec | 38.8 sec | 40.9 sec |
| 159°F | 70.6°C | 17.3 sec | 21.3 sec | 31.5 sec | 33.2 sec |
| 160°F | 71.1°C | 13.7 sec | 16.9 sec | 25.6 sec | 26.9 sec |
| 161°F | 71.7°C | 10.8 sec | 13.3 sec | 20.8 sec | 21.9 sec |
| 162°F | 72.2°C | 0 sec | 10.5 sec | 16.9 sec | 17.7 sec |
| 163°F | 72.8°C | 0 sec | 0 sec | 13.7 sec | 14.4 sec |
| 164°F | 73.3°C | 0 sec | 0 sec | 11.1 sec | 11.7 sec |
| 165°F | 73.9°C | 0 sec | 0 sec | 0 sec | 0 sec |
The headline: chicken held at 150°F for 2.7 minutes achieves the same 7-log Salmonella reduction that 165°F achieves instantly. This is why sous-vide chicken breast at 150°F is a legitimate technique rather than a stunt — and why any claim that “chicken is juiciest at 150°F,” offered without a holding time, is missing the only part that makes it safe.
Source: FSIS Cooking Guideline for Meat and Poultry Products (Revised Appendix A), December 2021, FSIS-GD-2021-14, relating to 9 CFR 318.17(a)(1), 318.23, 381.150(a)(1) and 417. Because fsis.usda.gov blocks automated retrieval, we read the complete document from the North Carolina Department of Agriculture’s mirror and verified the title, date and document ID match. For products mixing poultry species, FSIS directs you to use the longest dwell time from either table.
Safe is not the same as done — the barbecue problem
Every temperature above answers one question: is this safe to eat? None of them answers the other question a pitmaster cares about: is this tender?
USDA draws the distinction itself. FSIS: “‘Doneness’ refers to when a food is cooked to a desired state and indicates the sensory aspects of foods such as: Texture, Appearance, Juiciness… Most pathogens are destroyed between 140 degrees F and 165 degrees F. Consumers may cook food to higher internal temperatures to achieve a particular ‘doneness.'”
So USDA explicitly sanctions cooking past the safe minimum. It just declines to say how far, or why. Here is the why.
The collagen science
Texas A&M University’s Department of Animal Science is the one institutional source that publishes a number: “Briskets and pork butts are two of the most popular barbecue cuts, and both of them have a high percentage of connective tissue containing collagen. Collagen is converted to gelatin when heated… And it requires a higher internal temperature (ranges from 185 to 195°F) to achieve this conversion.”
The peer-reviewed literature adds the part that actually explains low-and-slow. Purslow (2018) in Meat Science reports that collagen’s thermal denaturation temperature measured at fast heating rates falls in the 62–67°C (143.6–152.6°F) range, but — critically — “collagen denaturation is a multistep, non-equilibrium process that is highly heating-rate dependent and can occur at 55–60°C in slow heating regimes, such as slow roasting or sous-vide cooking.” Tornberg (2005) puts denaturation at 53–63°C and notes that if the collagen fibers are not stabilized by heat-resistant bonds, they dissolve into gelatin on further heating.
That heating-rate dependence is the scientific basis for cooking low and slow, and it is why time at temperature matters more than the number on the display.
About 203°F. We searched Texas A&M Meat Science, Kansas State Animal Sciences, MSU Extension, the UT Beef and Forage Center, and the peer-reviewed Meat Science literature. There is no academic or government source for the famous 203°F brisket number, or for the 200–205°F range generally. The only institutional figure for collagen-to-gelatin conversion is Texas A&M’s 185–195°F. The 200–205°F window is barbecue convention, not a published scientific threshold — it exists because at those temperatures you have cleared the conversion range with margin. Probe tenderness, not the number, is the real endpoint. We would rather tell you that than cite a blog and call it science.
The reassuring math
Put the Appendix A table together with a twelve-hour cook and something useful falls out. Per Table 2, meat held at 145°F for four minutes already achieves a 7-log reduction. A brisket passes 145°F somewhere around hour three and then spends the next eight or nine hours climbing to 200°F. It is pasteurized many times over long before it is tender. Everything after hour three is texture, not safety.
Our smoking times and temperatures chart gives the pull temperature and the USDA safe minimum side by side for eighteen cuts, which is the practical version of this section.
Seven things people believe that USDA does not
| The belief | What USDA actually says |
|---|---|
| “Juices run clear means it’s done” | FSIS: “the color of the meat and the color of the juices are not accurate indicators of doneness.” USDA’s own research found patties that looked well-done at 131°F, found 150°F patties visually indistinguishable from 160°F ones, and found more than 25% of fresh ground beef patties browned prematurely. Some lean beef stays pink well above 160°F. |
| “That’s always been the rule” | FSIS told consumers to cook until juices ran clear until June 1997, then reversed to thermometer-only. The myth is a retired federal recommendation. |
| “Grill marks and color tell you enough” | FSIS: “In a USDA study, 21% of participants relied on visual cues such as color and grill marks…” |
| “Washing the meat first makes it safer” | Campylobacter survives on kitchen surfaces up to 4 hours, Salmonella up to 32 hours. Never use soap or detergent on meat. |
| “Leave the thermometer in from the start” | Type-dependent. FSIS: “Do not leave your food thermometer in food while cooking unless the manufacturer’s instructions specifically say it can withstand heat and has been designed for this purpose.” Designed to stay in: oven-safe bimetal, oven cord, wireless/smart, liquid-filled. Not designed to stay in: instant-read bimetal, thermocouple, thermistor, fork, single-use. |
| “Resting is just for juiciness” | For whole cuts of beef, pork, veal and lamb at 145°F, the 3-minute rest is a safety instruction. USDA: “During the three minutes after meat is removed from the heat source, its temperature remains constant or continues to rise, which destroys harmful bacteria.” Note the sequencing — 145°F must be reached before removing from the heat; the 3 minutes are additional. |
| “Everything needs a rest” | No. The 3-minute rest applies only to whole/intact cuts of beef, bison, goat, pork, veal and lamb, and to raw ham. Ground meats, all poultry, eggs, fish, leftovers and casseroles carry no required rest. The familiar 20-minute turkey rest is a quality recommendation, not a safety one. |
One number we will not give you: a figure for carryover cooking. The “pull it 5 to 10 degrees early” rule is real craft practice, but no USDA or extension source quantifies carryover in degrees, and it varies with mass, shape and pit temperature. USDA acknowledges that carryover happens — that is the stated rationale for the 3-minute rest — without putting a number on it. Neither will we.
Frequently Asked Questions
Do I leave the meat thermometer in while cooking?
Only if it is designed for it: oven-safe bimetal dial, oven cord probe, wireless/smart probe, or liquid-filled. Instant-read thermometers, thermocouples, thermistors and forks are meant to be used near the end of the estimated cooking time, then removed. Kenji López-Alt makes a further point worth weighing: a leave-in probe gets placed before cooking, when you cannot yet know where the coolest spot will end up, so it is better used as an early-warning system than as the final word.
What temperature is 135°F for meat?
135°F is a doneness preference, not a safety threshold — roughly medium-rare-to-medium on beef. It is 10 degrees below USDA’s 145°F safe minimum for whole cuts. Per FSIS Appendix A Table 2, meat held at 135°F for 37 minutes reaches a 7-log reduction, which is why steakhouse-style cooking is not automatically unsafe — but that holding time is a commercial standard measured throughout the product, not something you can verify on a grill.
Should I calibrate a new thermometer?
Yes, and then at least weekly, plus after any drop. Use ice water, not boiling water — especially above about 1,000 feet.
My thermometer reads 3°F off. Replace it?
If it is consistently off by a known amount and you cannot adjust it, you can simply do the arithmetic every time — though that is one more thing to get wrong at 11 p.m. with a bird resting. FDA’s Food Code requires ±2°F in commercial kitchens, so 3°F would fail a restaurant inspection. UConn’s practical line: a few degrees, adjust; more than a few, replace.
How do you calibrate a meat thermometer at altitude?
Use the ice-water method, not boiling water. Water boils below 212 °F at elevation — 202.4 °F in Denver, meaning a cook who calibrates against 212 °F there builds in a permanent 9.6 °F error (12.6 °F in Flagstaff). Ice water sits at 32 °F at every elevation on earth, so it calibrates correctly everywhere.
Is color a reliable way to check if meat is done?
No. USDA’s own research found ground beef patties that looked well-done at 131 °F, and more than 25% of patties browned before actually reaching the safe 160 °F minimum. A thermometer reading is the only reliable check.
Where should you insert a meat thermometer?
Into the thickest part of the food, away from bone, fat and gristle, and wait for the reading to settle. For thin foods like burgers or chops, insert through the side so the sensing area sits inside the meat. Check whole poultry in three places: the innermost thigh, the innermost wing, and the thickest part of the breast.
Why do USDA sources disagree on reheating temperature for ham?
Because two current USDA pages give different numbers. FSIS says to reheat a USDA-plant fully cooked ham to 140 °F; FoodSafety.gov says 165 °F. Both pages are current and neither has been corrected to match the other.
Sources:
- USDA FSIS, Food Thermometers, last updated March 21, 2025.
- FoodSafety.gov, Safe Minimum Internal Temperatures, last reviewed November 21, 2024.
- USDA FSIS, Safe Temperature Chart, last updated April 14, 2025.
- USDA FSIS, Cooking Guideline for Meat and Poultry Products (Revised Appendix A), December 2021, FSIS-GD-2021-14. Read via the North Carolina Department of Agriculture mirror; FSIS notice at FSIS Notice 59-21.
- USDA FSIS, High Altitude Cooking, last updated August 13, 2024.
- USDA FSIS, Doneness Versus Safety, last updated July 10, 2024.
- USDA FSIS, Color of Cooked Ground Beef as It Relates to Doneness, last updated May 23, 2024.
- USDA FSIS, Washing Food: Does it Promote Food Safety?, last updated February 7, 2024.
- USDA, Cooking Meat? Check the New Recommended Temperatures, Diane Van, USDA Meat and Poultry Hotline, May 25, 2011.
- FDA, Food Code 2022, §§ 4-203.11 and 4-302.12(B).
- University of Maryland Extension, FS-1092, How to Calibrate a Thermometer, Jackey & Henley, August 2019.
- South Dakota State University Extension, How to Calibrate a Meat Thermometer, Amanda Blair, October 23, 2023.
- Colorado State University Extension, High Altitude Food Preparation, revised 2013.
- NOAA/National Weather Service, Pressure Altitude.
- NIST Chemistry WebBook, Water, Antoine equation parameters (Bridgeman & Aldrich, 1964).
- USGS 3DEP Elevation Point Query Service, queried August 19, 2026.
- Texas A&M University Department of Animal Science, Barbecue Science.
- Purslow, P.P. (2018), “Contribution of collagen and connective tissue to cooked meat toughness,” Meat Science 144:127–134, DOI 10.1016/j.meatsci.2018.03.026.
- Tornberg, E. (2005), “Effects of heat on meat proteins,” Meat Science 70(3):493–508, DOI 10.1016/j.meatsci.2004.11.021.
- University of Connecticut Food Safety, Using Thermometers in the Kitchen, January 11, 2022.
- Robert W. Powitz, “Infrared Thermometry,” Food Safety Magazine, October 1, 2006.
- J. Kenji López-Alt, “How to Take the Temperature of Meat,” Serious Eats, updated January 18, 2024.
Related reading
- Smoking Times and Temperatures Chart — pit temp, time per pound, pull temp and USDA safe minimum for 18 cuts.
- What Is Barbecue, Really? — including the two FSIS pages that give different smoker temperatures.
- Turkey Thawing and Cooking Calculator — back-plans thaw, brine and cook times from your serve time.
- Smoked Brisket: How-To Guide
- Reverse Sear Steak
- Across the Brand Avalanche network: Current Homesteading’s canning times and pressures chart, built from NCHFP data the same way this page is built from FSIS data.
How this guide was made. Research-based, not experience-based. We read the current top-ranking pages for this query, then went to the primary sources: USDA FSIS and FoodSafety.gov consumer pages (quoting each page’s own last-updated date), the FDA Food Code 2022, FSIS Appendix A, four land-grant extension services, NOAA and NIST for the physics, and USGS for the elevations. The boiling-point table was computed from published NOAA and NIST relations and independently validated against Colorado State University Extension’s published values before publication. Where no authoritative source exists — infrared thermometers, brisket-specific probe placement, the 203°F figure, carryover in degrees — we say so instead of citing a blog. Written and edited by a human. Every source is linked so you can check us.

Reader Favorites
- Budget-Friendly BBQ Tips: Master Savings Now!
- Essential BBQ Tools: Get The Tools Pros Recommend Now
- Cleaning Your Gas Grill Cooking Grate: Make it Great Again
- Stainless Steel BBQ Grill Cleaning: Master Maintenance Now
- Best Beef Breeds: Pick The Best For Smoking Now
- Lid Open or Closed: Master Your Grill Heat Now
BBQ Temperature Charts & Guides
Four quick-reference tools every cook bookmarks — target temps, pull temps, and how long leftovers keep, plus the full BBQ glossary.
| Cut | Pull | Time |
|---|---|---|
| Brisket | 203°F | 12–16h |
| Spare ribs | 195–203°F | ~6h |
| Pork butt | 203°F | 12–14h |
Target temps & times for 17 cuts, sortable by meat, weight and doneness.
View full chart →| Doneness | Target |
|---|---|
| Rare | 125–130°F |
| Medium-rare | 130–135°F |
| Well-done | 160°F+ |
Rare to well-done, burger safety (160°F) and resting times.
View full chart →| Food | Fridge | Freezer |
|---|---|---|
| Brisket, ribs | 3–4 days | 2–3 mo |
| Smoked sausage | 1 week | 1–2 mo |
| Potato salad | 3–4 days | no freeze |
How long smoked meats & sides keep — fridge and freezer, USDA-based.
View full chart →Every pit term decoded — cooking methods, gear, cuts, wood, and technique, A to Z.
Open the glossary →