Clean Grill, Clean Smoke: How I Deep-Clean Any Pit for Steady Heat and Safe Cooks
Run your grill to 500°F for burn-off, keep ash and grease under control, and season your grates so every cook runs clean and steady.

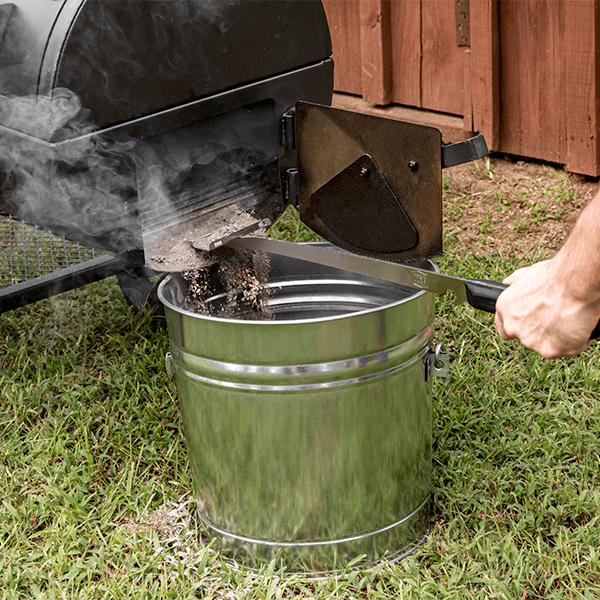
Intro: Why a Clean Grill Is Part of the Cook
I’m a smoke guy, not a sponge guy, but I’ll tell you this: if your pit’s filthy, you’re cooking with one hand tied behind your back.
Built-up grease and carbon in the cookbox, lid, and drip tray are a fire hazard and can throw rancid, bitter flavors right into your food.2 A drip pan that never gets emptied can light off like a frying pan full of old oil.1 On charcoal rigs, ash that sits and gets damp turns caustic, eats metal, and chokes your airflow so you’re fighting temps all day.2
Most folks get by on “scrape it when it looks bad.” I’d rather see you run a light cleaning after every cook and a true deep clean at least once or twice a year, more often if you’re burning every weekend.1
Food-safety wise, USDA’s grilling guidance is clear: start with clean hands and utensils, keep raw and cooked food separate, wash grill surfaces with soap and water, then let the heat finish the job on any leftover bacteria.10
One more hard truth: traditional wire-bristle grill brushes have put people in the ER when loose bristles stuck to grates, hid in food, and got swallowed.8 Consumer safety testing now pushes bristle-free tools instead of those old-school wire heads.9
So this guide is about cleaning with a pitmaster’s brain: protect the fire, protect the metal, protect the food. You’re not just polishing steel. You’re building a stable, repeatable cooker. You’re not cooking meat—you’re managing heat, air, and time.
Methods at a Glance
Here’s how I structure grill cleaning through the season.
| Method | When to Use | Pit / Burner Setting | Active Time | What You’re Doing |
|---|---|---|---|---|
| Routine After-Cook Burn-Off & Brush | After every cook | Gas: all burners on high | Charcoal: vents wide, fresh blast of heat | 10–15 minutes | Burn off residue, then brush warm grates clean while they’re still easy to scrape. |
| Monthly Deep Clean – Gas Grill | Every 4–8 weeks in season (or after heavy, greasy cooks) | Burners on high only for initial burn-off, then off and cool | 45–90 minutes | Disassemble grates, heat diffusers, drip tray; scrape cookbox; wash and reassemble. |
| Monthly Deep Clean – Charcoal / Kamado | Every 4–8 weeks in season | Short hot burn to dry, then cool | 45–90 minutes | Empty ash, scrape interior, clean grates, clear vents and ash catcher. |
| Cast-Iron Re-season Cycle | Any time grates look dull, patchy, or rusty | Low–medium heat, 350–400°F | 30–45 minutes (mostly passive) | Dry, oil, and bake on a thin seasoning layer so food releases and rust stays away. |
The rest of this guide walks you through exactly how to run each of those, with a couple of “recipes” for cleaning mixes I use on my own pits.
Essential Grill-Cleaning Tips (Tools, Fuel, and Setup)

Tools & Safe Cleaners (Tools & Fuel)
You don’t need a chemistry set. You need simple, food-safe gear that won’t wreck your grill.
Core tools
- Bristle-free grill scraper or coil-style brush (no loose wires)
- Nylon or non-scratch scrub pads
- Putty knife or stiff plastic scraper
- Bucket or tub for hot, soapy water
- Microfiber or shop towels you don’t mind staining
- Heat-resistant gloves
Mild cleaners that play nice with food-contact metal
- Warm water + plain dish soap
- Baking soda (for gentle abrasion and degreasing)5
- White vinegar (cuts light mineral and grease films)5
What to skip
- Wire-bristle grill brushes. Detached bristles have caused mouth, throat, and stomach injuries when swallowed.8
- Harsh chemicals like oven cleaner or bleach on grates and interior surfaces. They can damage finishes and may leave residues that aren’t meant for cookware.11
Safety Note
Always make sure gas is off at the control knobs and the tank before you start pulling a gas grill apart. Work in open air, not in a closed garage.
Fire Setup: Using Heat to Help You Clean
You don’t scrub a cold, greasy grill if you can help it. You let the fire do some of the work.
Gas grills – burn-off setup
- Close the lid and run all burners on high for 10–15 minutes after cooking. This chars stuck-on bits so they scrape easier.4
- Kill the burners, crack the lid, and let the grates cool just enough that a gloved hand can hover over them a couple seconds.
- Scrape or brush while grates are still warm.
Charcoal / kamado grills – burn-off setup
- When you’re done cooking, open the vents and run the fire a little hotter for 10–15 minutes to dry and char residue.
- Close vents to snuff the fire.
- Once coals are fully dead and the grill is warm (not blazing), scrape the grates.
Science Note
Warm metal expands and releases food easier. You’re also softening grease so it smears and lifts instead of chipping off in chunks.
Prep & Disassembly (Prep)
When it’s time for a deep clean, treat your grill like a brisket trim: systematic.
- Shut it down. On gas, close the tank valve, then turn burners on briefly to bleed off pressure. Turn them back off.
- Pull the big pieces. Remove cooking grates, any secondary/warming racks, and flavorizer bars or heat diffusers.
- Expose the guts. On gas, lift out burner covers. On charcoal, pull out the charcoal grate and ash catcher.
- Set up stations. One spot for dirty parts, one tub for hot, soapy water, one clear area for clean parts to dry.
Grease pans and trays come out too. Let those cool if they’re still hot; then dump carefully into a container that can go in the trash, not straight into your yard or sink.1
Cook Steps: Routine After-Cook Cleaning
This is your every-cook rhythm. It keeps you from ever facing a truly filthy pit.
- Burn-off. Run the grill hot with the lid closed for 10–15 minutes right after you cook.4
- Brush warm grates. With heat cut but grates still warm, scrape with a bristle-free tool along the bars, not across.
- Spot-wipe exterior. While the lid is warm, wipe down shelves, handle, and exterior with a damp cloth and a drop of dish soap if greasy.
- Dump loose ash (charcoal rigs). Once fully cold, empty ash from the kettle or ash catcher. Ash that sits damp can corrode steel and block airflow.2
- Empty obvious grease. If the drip tray has standing grease, dump it into a disposable container and give the tray a quick wash before it goes rancid or catches fire.1
Pro Tip
Five minutes of work while the grill is still warm beats an hour of chipping and scraping a month from now.
Deep-Clean Flow – Gas Grills (Stall Strategy, Doneness, Rest, Serve)
Once or twice a season—or any time you see heavy buildup—do the full teardown.
- Burn-off first. Run burners on high, lid closed, 10–15 minutes to loosen crud, then shut everything down and let the grill cool until just warm.
- Soak removable parts. Put grates and heat diffusers in hot, soapy water. Let them sit while you work on the cookbox.4
- Scrape the cookbox. Use a putty knife or scraper to push carbonized gunk toward the grease tray opening. Scoop it out and trash it. Built-up grease here can flare and smoke nasty.2
- Clean the drip tray and pan. Remove, dump, and wash with hot, soapy water. A neglected drip system is one of the biggest grill fire risks.1
- Detail the burners. Gently brush burner tubes with a dry, soft brush and clear any clogged ports with a toothpick. Don’t use water here.
- Scrub grates and diffusers. After soaking, hit them with a nylon pad or your cleaning paste (recipe below) until bare metal or enamel shows.
- Rinse and dry. Rinse soap off, dry thoroughly with towels, and air-dry. For cast iron, get them completely dry before oiling.
- Reassemble and heat. Put everything back, fire the grill on medium for 10–15 minutes to dry, then shut it down.
That reheating step is your “rest”—it drives off moisture and leaves you with a clean, dry firebox ready for the next cook.
Safety Note
Don’t blast a hot grill or grate with cold water. Rapid cooling can warp or crack metal and porcelain finishes.7
Deep-Clean Flow – Charcoal & Kamado Grills
Charcoal pits breathe by way of vents. If ash and grease choke those, you’ll never control the fire. You don’t chase temp, you manage fire.
- Confirm the fire is dead. No glowing coals, no heat waves. Ash should be cold.
- Scoop ash. Empty the firebox, ash catcher, and any corners where ash piles up. Damp ash is caustic and can rust out your kettle or firebox.2
- Knock down interior buildup. Use a plastic scraper or stiff brush inside the lid and bowl to knock off loose flakes.
- Wash grates. Pull cooking and charcoal grates, then wash or scrub with hot, soapy water and/or cleaning paste.
- Check vents. Make sure intake and exhaust vents move freely and aren’t packed with ash.
- Quick dry burn. Reassemble, light a short, hot fire, and run vents fully open for 15–20 minutes to dry everything out.
If you’re on a ceramic kamado, keep tools gentle—no metal scraping that can gouge the ceramic. Still, the same ash and vent logic applies.
Cleaning Recipes (My Go-To Mixes)

These are “recipes” I actually use. They’re cheap, easy, and they don’t stink up your cooker with weird chemicals. Deep cleaning heavily soiled grates with baking-soda-based pastes is an established, effective method for stainless and cast iron.5
Recipe 1: Baking-Soda Paste for Stubborn Grill Grates
Best for: Stainless steel and bare cast-iron grates. Skip this on delicate porcelain if the coating is questionable.
- Yield: Enough for 1 large three-burner grill’s worth of grates
- Prep Time: 5 minutes
- Work Time: 20–30 minutes scrubbing
- Total Time: 30–45 minutes
Ingredients
- 1 cup baking soda
- 1/4 cup warm water (plus more as needed)
- 1 tablespoon plain dish soap
Steps
- Mix the paste. Stir baking soda and dish soap together. Add warm water slowly until you get a spreadable, peanut-butter-like paste.
- Apply to dry grates. With grates removed and mostly cool, smear a thick layer of paste over the top and sides of the bars.
- Let it sit. Leave the paste on 15–20 minutes. This is your “stall”—the time it takes for the mix to soften grease and carbon.
- Scrub. Use a nylon scrub pad or bristle-free brush to work the paste into stubborn spots. Add a splash of water if it dries out.
- Rinse well. Rinse with warm water until no paste remains.
- Dry completely. Towel dry and air dry. For cast iron, follow the re-seasoning steps below.
Science Note
Baking soda is mildly alkaline and abrasive. It helps break up acidic, burnt-on grease without being harsh on metal.
Recipe 2: Vinegar–Citrus Soak for Grease Trays and Heat Diffusers
Best for: Grease trays, flavorizer bars, and other removable parts with baked-on fat.
- Yield: Enough soak for a standard gas grill’s trays and diffusers
- Prep Time: 5 minutes
- Soak Time: 30–60 minutes
- Total Time: 40–70 minutes
Ingredients
- 2 cups hot water
- 1 cup white vinegar
- Juice of 1 lemon or 2 tablespoons bottled lemon juice
- 1 teaspoon plain dish soap
Steps
- Mix the bath. In a plastic tub or deep pan, combine hot water, vinegar, lemon juice, and dish soap.
- Load the parts. Place cool grease trays and heat diffusers in the solution, fully submerged if possible.
- Soak. Let them sit 30–60 minutes. Longer soaks help on thick, sticky grease.
- Scrub. Use a non-scratch pad to wipe off loosened grease and residue.
- Rinse and dry. Rinse with clean water, dry thoroughly, and reinstall.
This isn’t magic, but it cuts the elbow grease way down and doesn’t leave harsh chemical smells behind.
Re-Seasoning Cast-Iron Grill Grates
Cast-iron grates need the same respect as a good skillet. After cleaning, they should be thoroughly dried, lightly coated in oil, and heated to build a rust-resistant, seasoned surface.5
- Yield: Seasoning cycle for 1 set of cast-iron grates
- Prep Time: 10 minutes
- Bake Time: 20–30 minutes
- Total Time: 30–40 minutes
Ingredients
- Clean, dry cast-iron grates
- 1–2 tablespoons neutral, high-smoke-point oil (canola, grapeseed, etc.)
- Paper towels or lint-free cloth
Steps
- Dry completely. After washing, put grates back on the grill over low heat for 5–10 minutes to drive off any hidden moisture.
- Oil thinly. Kill the heat. When grates are just warm enough to handle with gloves, wipe a very thin film of oil over all surfaces. No pools or drips.
- Bake it on. Fire the grill back up to 350–400°F with the lid closed for 20–30 minutes.
- Cool in place. Shut down the grill and let the grates cool inside.
If your bark ain’t got snap, it’s just meat leather—and if your cast iron ain’t seasoned, everything’s going to try to weld itself to the grate.
Troubleshooting: When Your Grill Fights Back

Problem: Heavy Flare-Ups and Bitter Smoke
Likely cause: Grease-soaked cookbox and drip tray, plus dirty grates.
Fix it
- Do a full deep clean: scrape the cookbox, empty and wash the drip tray, and scrub the grates as outlined above. Neglected grease in these areas is a known fire and off-flavor problem.2
- Cook fattier meats over a diffuser or on indirect heat so you’re not dumping more grease straight into the fire.
Problem: Grill Won’t Hold Temperature (Charcoal / Kamado)
Likely cause: Ash choking your air and dampening the fire.
Fix it
- Once the cooker is cold, empty all ash from the firebox and ash catcher.
- Check that intake and exhaust vents move freely and aren’t packed with dust.
- Add fresh charcoal and try again. Old, damp ash blocks airflow and speeds up corrosion.2
Problem: Rusty Grates
Likely cause: Grates put away wet, no seasoning layer, or weather exposure.
Fix it
- Scrub rust with a non-scratch pad or fine steel wool until you hit clean metal.
- Wash, rinse, and dry thoroughly.
- Run the cast-iron re-season cycle above.
- Going forward, always finish with a dry-and-oil routine before storage.
Problem: Moldy Grill After the Off-Season
Likely cause: Moisture trapped inside a closed, dirty grill.
Fix it
- Pull out any old food, foil pans, and trash.
- Scrape and wash the grates, cookbox, and drip tray with hot, soapy water.
- Let everything dry, then run the empty grill hot for 20–30 minutes to dry and burn off any residual funk.
- Once cool, wipe the interior surfaces to knock down any remaining loose residue. I don’t throw a grill out for surface mold; a thorough cleaning and a good hot burn has saved many a cooker.
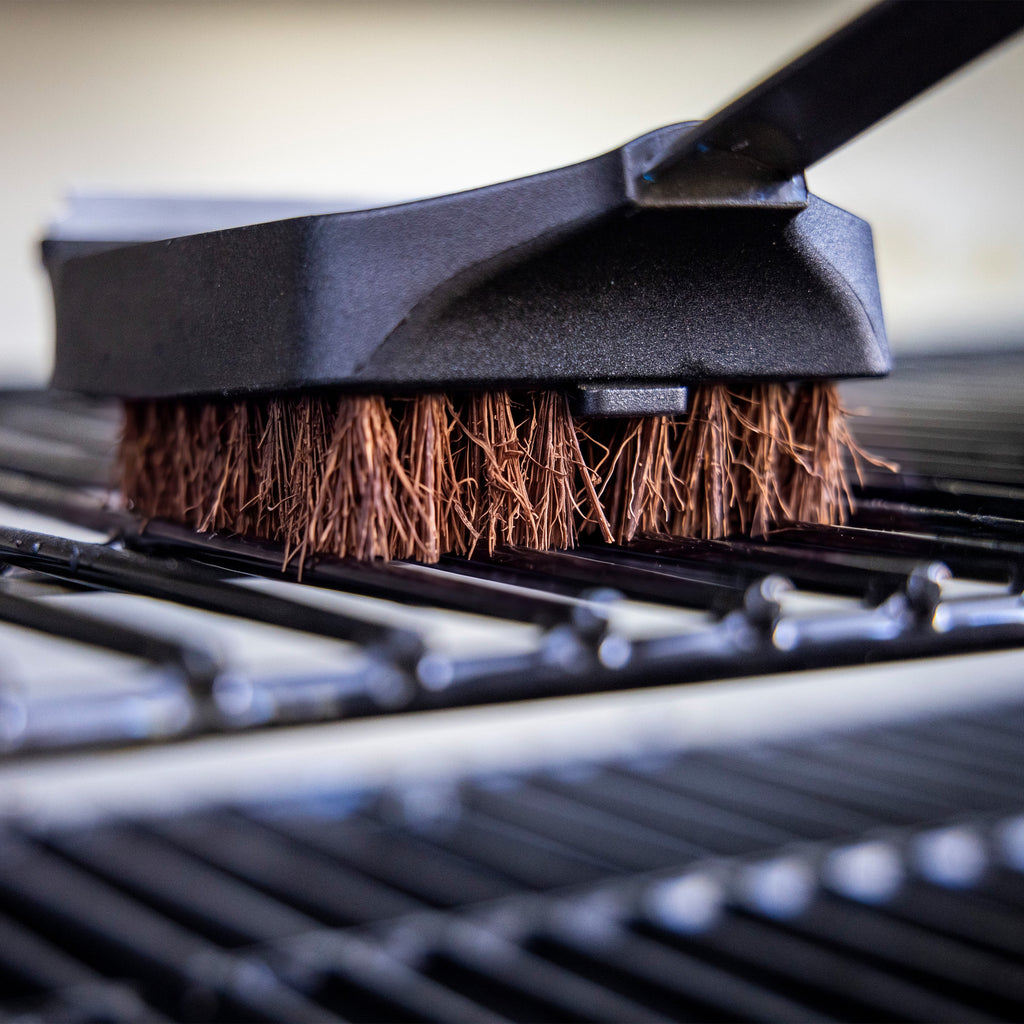
Problem: You’ve Been Using a Wire-Bristle Brush for Years
Why that’s a problem: Wire-bristle grill brushes have been tied to injuries where bristles lodged in people’s mouths, throats, or intestines after getting stuck to food.8
Fix it (starting now)
- Retire the wire-bristle brush.
- While the grill is cold, inspect the grates closely along the bars. If you see any suspicious little wires, pull them with pliers.
- Switch to a bristle-free scraper, coil-style brush, or nylon brush rated for grill temps. Consumer safety testing favors those over traditional wire heads.9
FAQs: Cleaning Your Grill Without Ruining It

How often should I deep-clean my grill?
For most backyard cooks, light cleaning after each cook plus a deeper clean at least once or twice a year keeps grease fires, off-flavors, and uneven heating in check.1 If you grill several times a week, monthly deep cleans are a better target.
Do I really need to clean the grates every time?
You don’t have to soap-and-water them after every burger, but you should do a quick burn-off and brush while grates are warm. Running the grill hot for a few minutes and then scraping warm grates is widely recommended as the easiest routine method.4
Is it safe to use oven cleaner or bleach on my grill grates?
Strong cleaners like oven spray or bleach aren’t a good idea on grates or interior surfaces that contact food. They can damage metal or coatings and may leave residues that aren’t meant for cookware. Milder options like dish soap, baking soda, and vinegar are preferred for food-contact parts.11
Can I just crank the grill to high and skip scrubbing?
High heat helps, but it doesn’t remove everything. You still need physical cleaning to get rid of built-up grease and carbon that can fuel flare-ups and affect flavor.2 Think of burn-off as step one, scraping and washing as step two.
How clean does the grill really need to be for food safety?
USDA grilling guidance stresses starting with clean hands, clean utensils, and clean grill surfaces washed with soap and water. Then you let the grill heat do its job on any remaining bacteria while you cook food to safe internal temperatures.10 You don’t need a mirror shine, but you do need to remove old food, grease, and visible grime.
What’s special about cast-iron grates?
Cast iron rusts fast if it’s left wet and unseasoned. After cleaning, cast-iron grates should be dried thoroughly, lightly coated with a high-smoke-point oil, and heated so that oil bakes into a protective layer.5
Can hosing a hot grill crack it?
Blasting a hot grill or porcelain-coated grate with cold water can warp or crack the metal or enamel. It’s safer to let the grill cool down before washing or soaking components.7
External Resources and Further Study

If you like having multiple voices in your ear, these are worth bookmarking.
- Serious Eats – How to Deep Clean Your Grill. A thorough photo-heavy walkthrough for both gas and charcoal deep cleans, with good notes on where grease hides.1
- AmazingRibs.com – Maintaining Grills or Smokers. BBQ-focused advice on why rancid grease and ash hurt flavor and safety, plus maintenance intervals.2
- Southern Living – How To Clean Your Grill. A concise seasonal-cleaning overview with practical, home-cook language.3
- Abt – Grill Cleaning Tips: How to Clean Grill Grates & More. Especially helpful for beginners on the burn-off-and-brush routine and soaking grates.4
- Arm & Hammer – How to Clean a Grill. Detailed “recipes” for baking-soda-based pastes and soaks that line up well with what I use.5
- Argentine Asado – How to Clean Grill Grates? Best Methods. A grilling-culture take on natural cleaning methods and staying consistent.6
- Better Homes & Gardens – Grill Cleaning Mistakes That Could Ruin Your Grill. A good list of don’ts, from bad cleaners to rapid cooling mistakes.7
- HGTV – How to Deep Clean Your Grill. Simple, visual step-by-step if you like seeing every stage laid out.13
- USDA FSIS – Grilling and Food Safety. The official word on cleanliness, cross-contamination, and cooking temps when you fire up the grill.10
- Consumer Reports – Wire Grill Brush Danger. Clear explanation of wire-brush risks and safer tool options.9
Closing Notes and Practice Plan

A clean pit isn’t about looks. It’s about safety, stable heat, and flavor. Grease and ash try to steal all three.
Here’s the practice plan I give my workshop folks:
- Every cook: Burn-off, brush warm grates, and dump obvious grease and ash.
- Every month in season: Do a quick teardown—grates, trays, and cookbox—plus an ash dump on charcoal rigs.
- Twice a year: Full deep clean and cast-iron re-season.
Run that rhythm for a season and pay attention. Your vents will respond sharper, your smoke will stay cleaner, and your food will taste more like the meat and less like last month’s chicken. BBQ without heart is just smoke—but BBQ without maintenance is just a fire hazard.
Sources
- How to Deep Clean Your Grill (Serious Eats)
- Cleaning and Maintaining Your Grill or Smoker (AmazingRibs.com)
- How To Clean Your Grill—Just in Time for Fourth of July Cookouts (Southern Living)
- Grill Cleaning Tips: How to Clean Grill Grates & More (Abt)
- How to Clean a Grill (Arm & Hammer)
- How to Clean Grill Grates? Best Methods (Argentine Asado)
- Grill Cleaning Mistakes That Could Ruin Your Grill (Better Homes & Gardens)
- Injuries from Ingestion of Wire Bristles from Grill-Cleaning Brushes (CDC MMWR)
- Guard Against Wire Grill Brush Dangers (Consumer Reports)
- Grilling and Food Safety (USDA FSIS)
- Things You Should Never Clean a Grill With (The Spruce)
- BBQ Season Checklist (AmazingRibs.com)
- How to Deep Clean Your Grill (HGTV)
Reader Favorites
- Essential BBQ Tools: Get The Tools Pros Recommend Now
- Cleaning Your Gas Grill Cooking Grate: Make it Great Again
- Stainless Steel BBQ Grill Cleaning: Master Maintenance Now
- Grill Baskets: Smoky Veggies & Fish Made Easy
- How to Grill Pizza: Stone or Grates? Tips & Tricks
- Black Friday: Find BBQ Deals for You Outdoor Chef Now
BBQ Temperature Charts & Guides
Four quick-reference tools every cook bookmarks — target temps, pull temps, and how long leftovers keep, plus the full BBQ glossary.
| Cut | Pull | Time |
|---|---|---|
| Brisket | 203°F | 12–16h |
| Spare ribs | 195–203°F | ~6h |
| Pork butt | 203°F | 12–14h |
Target temps & times for 17 cuts, sortable by meat, weight and doneness.
View full chart →| Doneness | Target |
|---|---|
| Rare | 125–130°F |
| Medium-rare | 130–135°F |
| Well-done | 160°F+ |
Rare to well-done, burger safety (160°F) and resting times.
View full chart →| Food | Fridge | Freezer |
|---|---|---|
| Brisket, ribs | 3–4 days | 2–3 mo |
| Smoked sausage | 1 week | 1–2 mo |
| Potato salad | 3–4 days | no freeze |
How long smoked meats & sides keep — fridge and freezer, USDA-based.
View full chart →Every pit term decoded — cooking methods, gear, cuts, wood, and technique, A to Z.
Open the glossary →